

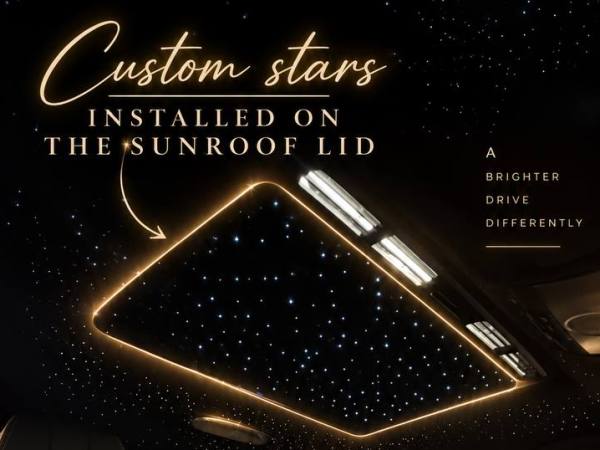
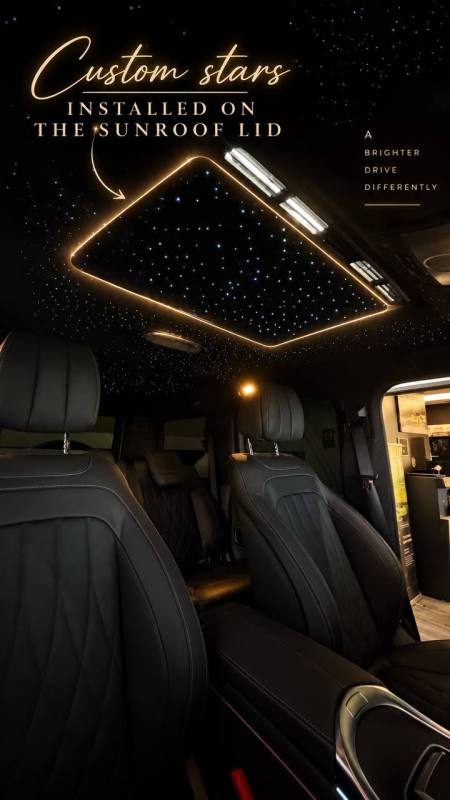
Adding a fiber-optic starlight ceiling transforms a vehicle cabin into an bespoke luxury space, but vehicles equipped with a moonroof or panoramic glass present a notorious challenge. Most automotive upholstery shops simply cut around the sunroof opening, leaving an awkward blank gap right above the driver and passenger seats. Attempting to run fiber strands directly into a sliding sunroof shade without an engineered clearance plan typically results in severed optical fibers, jammed slider tracks, or stripped motor gears.
Integrating starlight lighting directly into a sliding sunroof shade while maintaining full factory retraction is achievable. Doing so requires precise mechanical tolerances, low-profile fiber looping, and dynamic umbilical cable management.
| Core Insight | Practical Impact |
|---|---|
| Dynamic Service Loop Architecture | Prevents fiber optic snapping by coiling optical harnesses along dedicated travel tracks behind the cassette. |
| Micro-Drilling & Flush Shearing | Eliminates track snagging by ensuring backside fiber heads do not exceed sliding clearance tolerances. |
| Thermal & Mechanical Isolation | Prevents glue failure under high summer cabin temperatures using automotive-grade high-temp epoxies. |
Why Most Starlight Installs Skip the Sunroof Shade
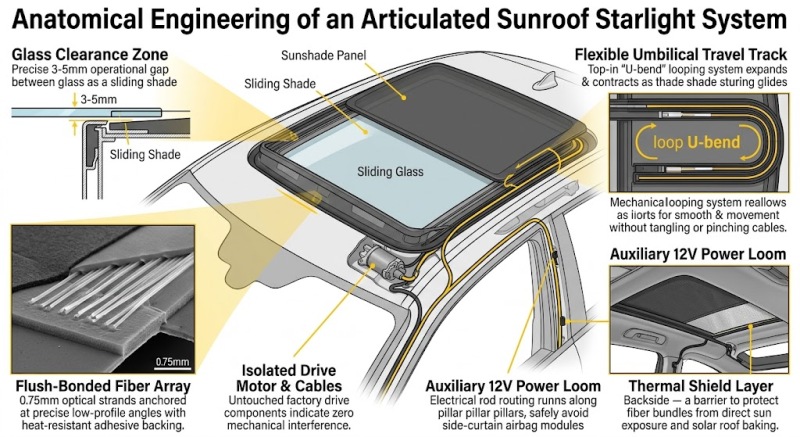
Factory sunroof shades glide inside tight mechanical tracks with overhead clearances often measuring less than 3 to 5 millimeters. Standard starlight installation techniques involve punching 0.75mm to 1.5mm fiber strands through a stationary headliner backing board, securing the backside with generous mounds of standard hot-melt glue, and bundling thick looms across the fiberglass shell.
If an installer applies that standard procedure to a sliding shade assembly, three immediate mechanical failures occur:
- Track Binding: Backside glue bumps collide with the sunroof cassette housing, locking the shade in place and overloading the drive motor.
- Fiber Shear: As the shade panel retracts into the roof cassette, rigid fiber strands catch against the metal frame edges and snap cleanly.
- Heat Delamination: Standard hobbyist hot glue softens when vehicles sit in intense summer heat, releasing fibers that fall into the open tracks and tangle inside the drive cables.
Achieving a seamless, fully functional constellation across both the fixed headliner and the moving shade requires treating the sunshade panel as a distinct, articulated mechanical subsystem.
Engineering the Sliding Mechanism: Key Approaches
Custom automotive fabricators use two primary architectures to route light into a moving roof shade without pinching cables:
[ Light Engine in Trunk / Pillar ]
              │
              ▼
    [ Main Fixed Looms ] ───► Standard Headliner Area
              │
    [ Flexible Umbilical Loom ]
              │
              ▼
     ┌───────────────────────────────────┐
     │     Retractable Articulated Tray  │
     │  (Glides smoothly inside cassette)│
     └───────────────────────────────────┘
              │
              ▼
    [ Ultra-Low Profile Shade Panel ]
1. The Articulated Umbilical Ribbon (Drag Chain Method)
This method adapts industrial CNC cable management to automotive headliners. Optical fibers feeding the sunroof shade are housed inside a miniature, flexible cable carrier (drag chain) or a flat braided nylon sleeve. The sleeve routes along the side of the sunroof cassette and folds back on itself in a controlled “U-bend.” As the shade retracts, the loop expands smoothly into the roof cavity without twisting or bending beyond the fiber’s minimum bend radius.
2. The Recoil Spring Tension System
In vehicles with limited lateral clearance alongside the cassette, installers route fibers through a specialized spring-loaded retractor assembly positioned behind the rear sunroof frame. When the shade slides forward to close, the harness pays out smoothly under gentle spring tension. When opened, the tensioner reels the slack backward, keeping the bundle taut and preventing it from dropping into passenger sightlines or bunching in the glass track.
Technical Specifications: Standard vs. Sunroof-Ready Build
| Engineering Parameter | Static Headliner Section | Sliding Sunroof Shade Panel |
|---|---|---|
| Fiber Diameter | 0.75 mm – 1.50 mm mixed | 0.50 mm – 0.75 mm ultra-flexible |
| Backside Protrusion Clearance | Up to 15 mm allowable space | Must remain strictly under 1.5 mm |
| Bonding Adhesive | Commercial high-temp hot glue (>190°F / 88°C) | Flexible cyanoacrylate + structural contact film |
| Loom Protection | Tesa 51036 automotive cloth tape | Expandable PET braided sleeving / nylon ribbon |
| Slack Management | Anchored stationary along factory wire channels | Dynamic U-loop or constant-force tension spring |
Step-by-Step Installation Architecture
1. Sunshade Extraction and Track Clearance Mapping
Before drilling a single hole, the sunroof glass and shade panel must be extracted from the roof cassette. Technicians measure clearance depths between the top surface of the sunshade and the lower lip of the exterior glass guide rails. This depth determines the maximum allowable glue and fiber profile.
2. Precision Micro-Drilling and 90-Degree Bending
To preserve track clearance, the sunshade panel uses smaller-gauge (0.50mm to 0.75mm) end-glow PMMA optical fibers. Each hole is drilled at a slight 45-to-60 degree angle rather than perpendicular. This allows the fiber strand to immediately lay flat against the backing board without forming a raised loop that would catch on the cassette roof.
3. Flush Chemical Securing
Standard hot glue guns cannot be used on sliding panels due to adhesive bead height. Instead, technicians anchor fibers using high-shear flexible adhesives or thin structural tape laminates. Each fiber is seated flush, and the backside is sealed with a protective layer of low-friction friction-resistant backing fabric to guarantee zero catch points against overhead sheet metal.
4. Constructing the Dynamic Travel Loop
Fibers from the shade panel gather into a single flat ribbon bundle at the rear edge of the moving panel. This ribbon routes into the dead-space between the headliner board and the outer roof skin. By anchoring the static end near the rear drainage tray and leaving a calibrated 12-to-18 inch sweep curve, the harness moves freely throughout the shade’s complete travel cycle.
4 Costly Pitfalls to Avoid
- Exceeding the Minimum Bend Radius: Bending PMMA optical fiber tighter than 10 times its diameter causes micro-fracturing of the optical core, resulting in immediate light loss and permanent dark spots.
- Tapping Power from Sunroof Motor Feeds: Splicing the starlight light engine directly into factory sunroof drive circuitry can trigger body control module (BCM) fault codes or cause low-voltage shuttering in modern German and American vehicles. Always use a dedicated, 12V switched auxiliary fuse tap with an inline fuse.
- Ignoring Airbag Deployment Zones: The master optical harness running down to the power source must be routed behind side-curtain airbag cartridges, never across the tear-seam or deployment path.
- Omitting Ambient Thermal Expansion Buffers: Sunroof assemblies experience direct solar radiation, elevating cassette temperatures above 160°F (71°C). Non-automotive adhesives will fail, dropping fiber slack directly into the open sliding track.
Decision Matrix: DIY Build vs. Professional Custom Shop
| Evaluation Factor | DIY Installation | Professional Automotive Specialist |
|---|---|---|
| Tooling & Equipment | Standard drills, basic trim tools, hobby hot glue | Micro-index tooling, low-profile adhesives, digital load testing |
| Risk to Moving Components | High risk of motor burnout or track derailment | Full mechanical alignment and clearance calibration |
| Time Investment | 25 – 40 hours for full cabin extraction and routing | Completed in 1 to 2 business days |
| Warranty & Safety | No protection against broken headliner tabs or pinched airbags | Backed by electrical, upholstery, and mechanism warranties |
For car audio and interior enthusiasts looking for a showroom-quality finish without compromising functional roof mechanics, professional installation ensures precision. You can explore specialized bespoke craftsmanship and vehicle-specific overhead engineering through Sorena Car Audio’s custom starlight headliner services.
Frequently Asked Questions
Can you install starlight headliners on a panoramic sunroof shade?
Yes, but panoramic shades require an extended dynamic service loop due to their longer travel distance. Because panoramic shades frequently use flexible tension fabrics rather than rigid sliding boards, the fibers are woven into reinforced sub-layers and gathered along a lateral guide rail so the fabric rolls or retracts without crushing the optical filaments.
Will adding starlights to my sunroof shade void my vehicle warranty?
Installing starlights does not void your entire vehicle warranty, as protected under the Magnuson-Moss Warranty Act in the United States. However, if an improper installation damages the sunroof motor, pinches factory wiring, or breaks track rails, the dealership will deny warranty coverage for those specific components. Working with an experienced automotive shop prevents system damage.
How do you power the stars on a moving panel without visible hanging wires?
The power source (the LED light engine) is stationary, typically concealed behind trunk paneling or within the C-pillar. Only flexible, non-conductive fiber-optic strands travel to the roof. The slack is managed above the headliner board inside an articulated, self-retracting harness channel that remains completely hidden from cabin view regardless of whether the shade is open or closed.
Does the installation cause rattles or cabin wind noise?
When installed correctly, no noise is introduced. Professional installers wrap all traveling fiber harnesses and static looms in automotive-grade Tesa fleece harness tape. This prevents optical strands from clicking against the metal roof skin under chassis vibration and cushions the dynamic loops against the sunroof frame.
Precision Interior Craftsmanship
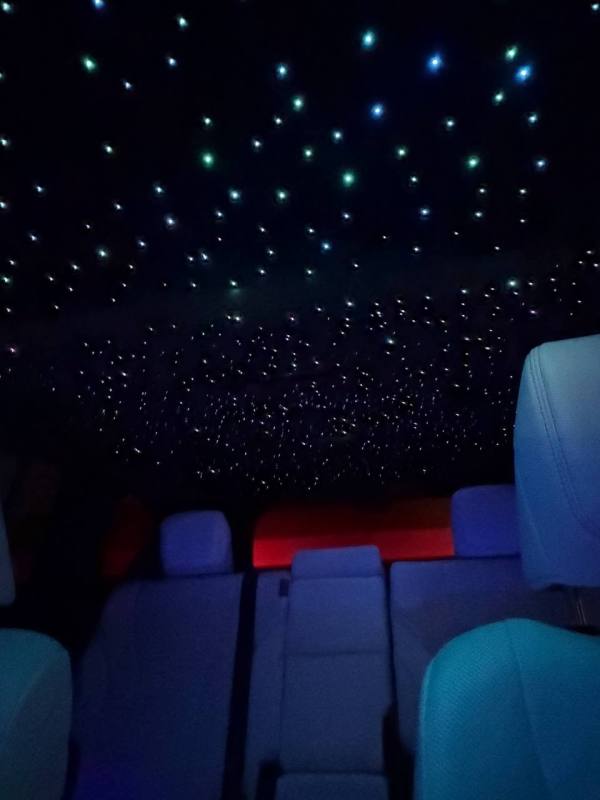
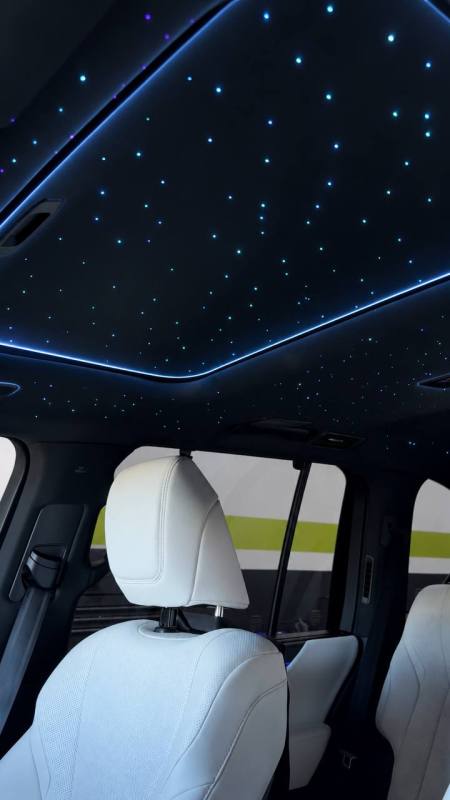
A starlight headliner should enhance your cabin without sacrificing factory amenities. While standard installations leave the sunroof area as an unfinished blank slate, specialized engineering allows the fiber optic constellation to span the entire vehicle ceiling while keeping the moonroof fully functional.
Achieving this requires microscopic clearance management, high-temperature adhesives, and dynamic harness routing. For drivers who demand flawless luxury, safety compliance, and bespoke aesthetic design, partnering with skilled professionals ensures your custom interior performs reliably mile after mile.
Reviewed by the Master Technician Team at Sorena Car Audio. This content reflects professional custom interior fabrication knowledge, automotive electrical safety practices, and precision overhead engineering.
We offer all car audio services
List of Services:
- DashCam
- Ambient Lighting
- Starlight
- Windows Tinting
- Armoring & Ballistic Protection
- Apple CarPlay
- Dash Upgrade
- Android Auto
- Paint Protection Film (PPF)
- Sound Deadening – Sound Proofing
- Front and Rear Parking Sensors
- Blind Spot Radars
- Car Ceramic Coating
- HD Backup Camera
- Mirror Monitor
- Subwoofer Integration
- Classic Car Audio
- Wheel Well Sound Deadening
- Marine Audio System
- Marin Audio
- Flipdown Monitor
- Bluetooth Integration
- Rear Entertainment System
- Steerig Wheel Upgrade
- Car Wrapping
- Interior Suede Alcantara Wrap
- Alcantara Suede Headliner
- ECU Tuning
- Center Console Safe Installation
Leave A Comment