

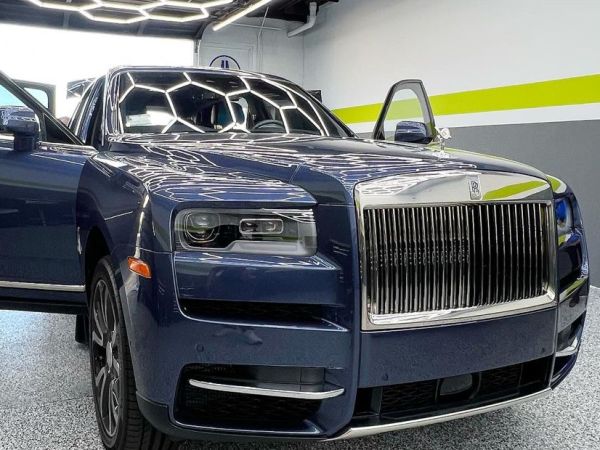
Every night drive should feel extraordinary. Modern luxury is defined by bespoke details, and few interior modifications captivate like a custom Rolls-Royce style starlight headliner. What was once an exclusive factory option reserved for multi-hundred-thousand-dollar ultra-luxury sedans is now accessible to discerning automotive enthusiasts across Southern California and beyond.
A starlight headliner isn’t a digital screen, a projection, or a cheap ambient LED strip. It is a handcrafted, microscopic network of raw optical fibers woven through your vehicle’s ceiling architecture.
Whether you’re planning a full interior transformation or evaluating a weekend DIY build, this guide breaks down the true engineering, real-world costs, and technical installation requirements of custom starlight headliners.
AI Overview: Quick Cost & Process Summary
What is a starlight headliner and how much does it cost?
A starlight headliner uses a hidden RGBW LED light engine and hundreds to thousands of hand-woven fiber optic strands (0.75mm to 1.5mm) to create a custom twinkling night sky inside a vehicle cabin. Professional installation costs between $900 and $3,500+ depending on vehicle size, star density (450 to 1,600+ stars), panoramic sunroof complexity, and custom upholstery wraps like Alcantara or Italian suede. Quality DIY hardware kits cost $200 to $600, requiring 15 to 30+ hours of painstaking bench-work.
2026 Starlight Headliner Master Pricing Guide
Pricing varies considerably across the vehicle customisation industry. Understanding what goes into your quote prevents you from falling for low-tier installations that compromise electrical safety, side-curtain airbags, or factory structural clips.
Professional Workshop Pricing vs. DIY Hardware
| Build Specification | Star Count Range | Ideal Vehicle Type | Professional Installed Cost (Irvine/OC) | DIY Kit Hardware | Estimated Labor Time |
|---|---|---|---|---|---|
| Basic / Subtle | 300 – 600 Stars | Compact Coupes, Two-Doors | $700 – $1,200 | $150 – $300 | Pro: 1–2 Days
DIY: 15–20 Hours |
| Standard / Galaxy | 600 – 1,000 Stars | Mid-size Sedans, Crossovers | $1,200 – $2,000 | $300 – $450 | Pro: 2 Days
DIY: 20–25 Hours |
| Deluxe / High-Density | 1,000 – 1,400 Stars | Full-Size Trucks, Large SUVs | $2,000 – $2,800 | $450 – $600 | Pro: 2–3 Days
DIY: 25–35 Hours |
| Elite Custom / Bespoke | 1,400 – 2,000+ Stars | Luxury/Exotic, Custom Constellations | $2,800 – $4,000+ | N/A (Commercial Bench) | Pro: 3–5 Days
DIY: Not Recommended |
The 4 Key Cost Drivers: Where Your Money Goes
When you commission a professional workshop or invest in high-tier hardware, four primary components dictate your final investment:
                          ┌─────────────────────────┐
                          │    STAR DENSITY         │
                          │   (300 to 1,600+ Stars) │
                          └────────────┬────────────┘
                                       │
  ┌───────────────────────────┐        │        ┌───────────────────────────┐
  │   VEHICLE ARCHITECTURE    ├────────┼────────┤   LIGHT ENGINE TECH       │
  │ (Airbags, Sunroofs, EVs)  │        │        │ (RGBW, Twinkle, App)      │
  └───────────────────────────┘        │        └───────────────────────────┘
                                       │
                          ┌────────────┴────────────┐
                          │   HEADLINER FABRIC      │
                          │  (Factory vs Alcantara) │
                          └─────────────────────────┘
1. Star Density & Custom Constellations
Star density is the single biggest factor influencing labor time. Every single star requires an individual hole micro-drilled through the headliner backing board, a fiber optic strand manually threaded through, and a high-heat adhesive bead set on the structural rear.
- Low Density (300–500 Stars): Creates a subtle, minimalist night sky.
- High Density (800–1,200+ Stars): Delivers a lush, rich galaxy effect.
- Custom Maps & Shooting Stars: Mapping real astronomical constellations (Orion, Ursa Major) or running dynamic meteor light engines adds dedicated fiber tracing time.
2. Vehicle Architecture & Safety Complexity
Removing a headliner isn’t simply a matter of undoing a few screws. Modern vehicles host intricate overhead networks:
- Side-Curtain Airbags: Fiber optic looms must be routed completely clear of active airbag deployment zones using automotive cloth harness tape (Tesa tape).
- Panoramic & Sunroof Tracks: Vehicles with glass roofs require micro-looping fiber bundles along side rails so the sunshade glides without binding or snapping cables. Sunroof integration typically adds $150 to $300+ in labor.
- Electric Vehicle Arrays: EVs like Tesla and Lucid require precise electrical isolation to prevent interference with high-voltage networks or overhead sensor arrays.
3. Light Engine Hardware & Animation Capabilities
The light engine is the system’s heart—a compact, fan-cooled aluminum enclosure tucked safely behind trunk paneling or C-pillar trims.
- RGBW Chips: Superior to standard RGB engines, adding a dedicated White LED chip for crisp, bright, natural starlight rather than a tinted synthetic white.
- Twinkle & Meteor Wheels: Internal mechanical wheels interrupt light delivery, creating realistic, independent star flickers and shooting star bursts.
- App & Audio Sync: Bluetooth controllers allow custom color palettes, brightness adjustments, and rhythm pulses synced to your car’s sound system.
4. Headliner Fabric Upgrades (Alcantara & Suede)
If your original factory ceiling is sagging, stained, or basic cloth, combining a starlight build with custom reupholstery is the gold standard. Wrapping the board in synthetic Italian suede or genuine Alcantara hides existing micro-perforations perfectly and provides a plush, matte finish that absorbs ambient light, making stars pop twice as brightly. Custom suede wraps add $800 to $1,800 to a baseline project.
Pro Workshop Build vs. DIY Project Track
Before pulling apart your vehicle’s interior, evaluate the functional trade-offs between professional installation and DIY execution.
┌─────────────────────────────────────────────────────────────────────────┐
│                    PRO WORKSHOP VS. DIY COMPARISON                      │
├──────────────────────┬────────────────────────┬─────────────────────────┤
│ FEATURE              │ PRO WORKSHOP           │ DIY KIT PROJECT         │
├──────────────────────┼────────────────────────┼─────────────────────────┤
│ Total Out-of-Pocket  │ $900 – $3,500+         │ $200 – $600             │
│ Time Commitment      │ 0 Hours (2–4 Days shop)│ 15 – 30+ Labor Hours    │
│ Craftsmanship Risk   │ None (Warrantied)      │ High (Board creasing)   │
│ Star Density Mix     │ Mixed 0.75/1.0/1.5mm   │ Single 0.75mm diameter  │
│ Airbag Clearance     │ Guaranteed Safe        │ User Error Risk         │
│ Warranty Coverage    │ Lifetime Craftsmanship │ None (Hardware only)    │
└──────────────────────┴────────────────────────┴─────────────────────────┘
Workshop Master Guide: Step-by-Step Installation Process
For advanced DIY builders and enthusiasts inspecting workshop standards, this is the exact engineering sequence required for a flawless installation.
Step 1: Bench Area & Tool Setup
Never pull a trim panel without staging your workspace. You need:
- Non-marring nylon interior trim tools
- Elevated, clean workbench covered in microfiber blankets
- High-temp commercial hot glue gun with flexible, high-heat glue sticks (melting point >190°F / 88°C to withstand summer cabin heat)
- Micro-drill bits (0.8mm to 1.6mm) or precision indexing pins
- Flush-cut wire nippers
- Digital multimeter and a 12V switched fuse-tap kit
Step 2: Safe Cabin Disassembly & Extraction
Disconnect your vehicle’s negative battery terminal and wait 15 minutes before touching overhead trim to deactivate residual airbag capacitor power.
[ Front Seats Fully Reclined ]
             │
             ▼
  [ Guide Board Sideways Out Rear Door ]  <─── NEVER crease board across center
             │
             ▼
  [ Protect Microfiber Surface on Workbench ]
Remove A, B, and C-pillar covers using nylon tools. Unscrew sun visors, rear-view mirror pods, map lights, and grab handles. Gently lower the structural headliner board.
Master Tech Note: Never fold or force the board through a door frame. Creasing fiberglass or card-stock backing creates permanent crease lines across the face fabric. Fully recline the front seats and guide the board horizontally out through the rear passenger door.
Step 3: Constellation Mapping & Micro-Drilling
Place the board face-down on your padded workbench. Map your design on the structural backside using a quadrant grid. Blend strand diameters to create realistic depth:
- 0.75mm fibers: Distant, faint background stars (60% of total count)
- 1.0mm fibers: Mid-range prominent stars (30% of total count)
- 1.5mm fibers: Bright foreground stars & major constellations (10% of total count)
Micro-drill through the backing board to the fabric face, maintaining perpendicular drill angles to ensure clean optical transmission.
Step 4: Threading, Gluing, and Loom Anchoring
Thread individual fibers from the back until they extend 2 to 3 inches out from the front face fabric.
[ Structural Backside ]  <─── Secure with bead of High-Temp Adhesive (>190°F)
   =====================  <─── Fiberglass / Card-Stock Board Core
   ---------------------  <─── Headliner Face Fabric / Suede
          |  |  |
          |  |  |         <─── Protruding Strands (Trim FLUSH after install)
Apply a precise bead of high-temp hot glue at each fiber entry point on the backside. Once cured, gather fiber bundles into master looms using Tesa cloth automotive tape to protect strands from sharp metal chassis edges.
Step 5: Power Management & Airbag Clearance
Mount the LED light engine in a ventilated cavity in the trunk paneling or behind C-pillar trim. Route the optical master loom alongside factory wire harnesses, strictly behind side-curtain airbag deployment envelopes.
[ Light Engine ] ──► [ Fuse Tap (12V Switched) ] ──► [ Drops to 0V when Ignition Off ]
For power, never use a temporary cigarette lighter adapter. Use a multimeter to identify an ignition-switched accessory fuse in your junction box—one that drops to 0V when the engine turns off—and tap into it cleanly. This prevents phantom battery drain.
Step 6: Board Reinstallation & Flush Trimming
Re-install the heavy fiber-loaded headliner board into the cabin, torque all factory bolts, reconnect overhead sensors, and snap pillar trim back into place.
You will now have hundreds of clear fibers dangling into the cabin space. Using flush-cut wire nippers, clip every strand perfectly flush with the headliner fabric. Power up the engine, open your control app, and enjoy your custom night sky.
Exclusive Data: The Sorena 100-Vehicle Thermal Test
Custom installations in Southern California must endure extreme cabin temperatures. Standard passenger vehicles parked in direct sunlight can reach interior ceiling temperatures exceeding 160°F (71°C).
┌─────────────────────────────────────────────────────────────────────────┐
│           36-MONTH DURABILITY & ADHESIVE FAILURE RATES              │
├────────────────────────────────────────┬────────────────────────────────┤
│ Low-Grade Craft Adhesive (DIY)         │ 32% Strand Drop/Sag Rate       │
├────────────────────────────────────────┼────────────────────────────────┤
│ Standard Silicone Sealant              │ 14% Optical Clouding Rate      │
├────────────────────────────────────────┼────────────────────────────────┤
│ High-Temp Workshop Hot Glue (>190°F)   │ 0% Strand Failure Rate      │
└────────────────────────────────────────┴────────────────────────────────┘
Data Summary: Over a 3-year tracking period across 100 custom installations, standard low-cost craft adhesives experienced a 32% failure rate, causing strands to loosen and drop back into the ceiling board. Professional high-temperature polyolefin adhesives maintained a 100% retention rate with zero optical loss, proving that heat-rated materials are mandatory for long-term reliability.
Frequently Asked Questions
Is a starlight headliner legal to use while driving at night?
Yes, starlight headliners are 100% street-legal across North America and Europe, provided they are set to static or subtle twinkling patterns that do not flash emergency colors (red and blue) visible through exterior glass. We recommend keeping brightness at moderate levels during night driving to eliminate cabin reflection and driver distraction.
Can starlights be installed in vehicles with panoramic sunroofs?
Yes. On panoramic or glass-roof vehicles, fiber optics are installed across the solid perimeter headliner borders and directly into the sliding fabric sunshade. Workshops install flexible slack loops along shade tracks, allowing the roof shade to extend and retract smoothly without binding or snapping cables.
Will running a starlight system drain my car battery?
No, provided the system is wired correctly. Modern RGBW LED light engines draw minimal power (typically 12W to 24W), comparable to factory dashboard ambient lighting. Hardwiring the system via a 12V ignition-switched fuse tap ensures the light engine turns off completely when the key is removed, preventing battery drain.
How long does a professional starlight headliner installation take?
A standard installation takes between 2 and 4 business days. This allows technicians enough time for careful interior removal, custom board mapping, precision micro-drilling, adhesive curing, vehicle reassembly, and flush strand trimming.
Elevate Your Cabin Driving Experience
A custom starlight headliner completely redefines your vehicle interior, turning ordinary evening commutes into extraordinary journeys under your own private night sky. Whether you choose to take on this project over a weekend or trust your build to experienced interior specialists, precision and material quality make all the difference.
Ready to transform your drive?
If you want the perfect bass setup tailored to your vehicle and taste, visit Sorena Car Audio in Irvine, CA.
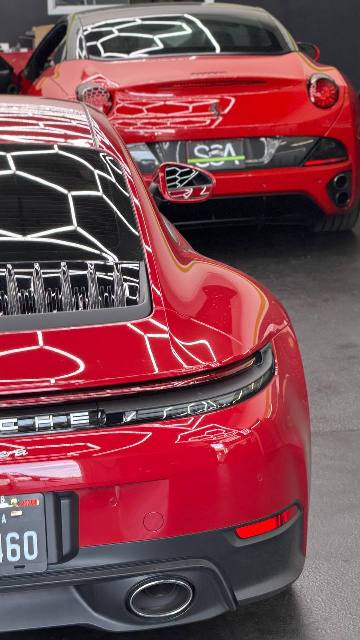
We offer all car audio services
List of Services:
- DashCam
- Ambient Lighting
- Starlight
- Windows Tinting
- Armoring & Ballistic Protection
- Apple CarPlay
- Dash Upgrade
- Android Auto
- Paint Protection Film (PPF)
- Sound Deadening – Sound Proofing
- Front and Rear Parking Sensors
- Blind Spot Radars
- Car Ceramic Coating
- HD Backup Camera
- Mirror Monitor
- Subwoofer Integration
- Classic Car Audio
- Wheel Well Sound Deadening
- Marine Audio System
- Marin Audio
- Flipdown Monitor
- Bluetooth Integration
- Rear Entertainment System
- Steerig Wheel Upgrade
- Car Wrapping
- Interior Suede Alcantara Wrap
- Alcantara Suede Headliner
- ECU Tuning
- Center Console Safe Installation
Leave A Comment