Understanding the Tesla-Style Screen
Design and Size Differences
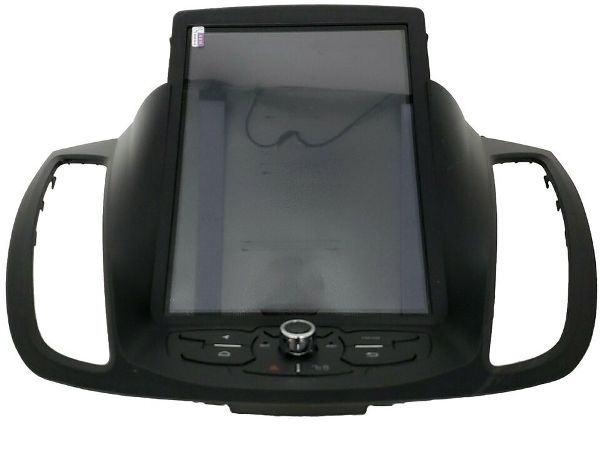
Tesla-style screens are vertical (portrait) rather than horizontal (landscape), giving you a more smartphone-like interface. They’re usually 10″ to 16″ tall, sometimes stretching the whole dash.
Functionality and Features
These touchscreens often include:
- Navigation (Google Maps, Waze)
- Music streaming (Spotify, YouTube, etc.)
- Bluetooth calling and messaging
- Climate control integration
- Reverse and dash cam display
Benefits of Vertical Orientation
A vertical layout means more info at a glance. You can view navigation and music controls at the same time without toggling between tabs. It’s not just stylish—it’s practical.
Is It Even Possible in a Non-Tesla?
Compatibility Factors
Not every car is a candidate. You need:
- A dash that can physically fit a larger screen
- Proper wiring harnesses
- Access to aftermarket installation kits
Common Car Models for Upgrade
Some popular models include:
- Ford F-150
- Dodge RAM
- Toyota Tundra
- Jeep Wrangler
- Honda Accord
- Chevy Silverado
Risks to Consider
- May void warranty
- Can mess with factory systems if done wrong
- Cheap screens might lag or overheat
What You Need Before the Upgrade
Check Your Vehicle’s Dash Layout
Is there enough room for a vertical screen? Some cars may require trimming or custom dash kits.
Factory Stereo Compatibility
Know what you’re working with:
- Double DIN? Single DIN?
- Stock navigation or base model?
Power Supply and Wiring Basics
Most Tesla-style screens require a 12V connection. Check fuse locations and consider a voltage meter to avoid electrical issues.
Choosing the Right Tesla-Style Screen
Top Brands in the Market
- T’Eyes
- Linkswell
- Phoenix Automotive
- Seicane
Key Features to Look For
- Android-based OS (usually Android 10 or higher)
- Octa-core processor
- At least 4GB RAM and 64GB storage
- IPS display with HD resolution
Budget Considerations
Expect to spend:
- $400–$700 for the unit
- $200–$500 for installation (if not DIY)
Installation Process Overview
DIY vs Professional Installation
DIY saves cash but needs patience and some tech know-how. Pro installs are safer for wiring and integration.
Tools You’ll Need
- Trim removal tools
- Screwdrivers (Phillips and flathead)
- Socket wrench set
- Wire crimper and stripper
- Multimeter
Step-by-Step Process (Basic Overview)
- Disconnect car battery
- Remove trim and old stereo
- Connect harnesses to the new screen
- Mount screen using brackets
- Test before final reassembly
Deeper Dive: DIY Installation Guide
Removing the Old Head Unit
Pop off the dash trim gently. Unscrew the OEM unit and disconnect all harnesses.
Mounting the New Screen
Use the bracket included with the kit. Some may require slight modifications.
Wiring and Power Connections
Match each wire correctly using the wiring diagram provided. This step is crucial for proper functionality. Use crimp connectors or solder for a secure fit.
Testing the System
Before reinstalling the dash, turn on the car and test the screen. Check every function—touch response, audio output, backup camera view, and connectivity features.
Final Reassembly
Once confirmed, proceed to reassemble the dashboard trim carefully. Ensure no wires are pinched, and everything fits snugly.
Post-Installation Tips
Software Updates
Check the manufacturer’s website or system settings for available firmware updates. This ensures better performance and fixes any initial bugs.
Custom Settings
Adjust screen brightness, wallpapers, app layout, and steering wheel controls (if supported). Some units also allow split-screen customization for multitasking.
Regular Maintenance
Keep the screen clean using a microfiber cloth. Avoid harsh chemicals. Perform system restarts if it slows down over time to refresh performance.
Final Thoughts
Tesla-style vertical screens can give your vehicle a futuristic, functional, and premium touch. Whether DIY-ing or going pro, planning and attention to detail ensure the upgrade is worth the investment.

Contact us to explore a wide range of car audio services.
List of Services:
- DashCam
- Ambient Lighting
- Starlight
- Apple CarPlay
- Android Auto
- Paint Protection Film (PPF)
- Sound Deadening – Sound Proofing
- Front and Rear Parking Sensors
- Blind Spot Sensors
- HD Backup Camera
- Mirror Monitor
- Subwoofer Integration
- Classic Car Audio
- Wheel Well Sound Deadening
- Marine Audio System
- Marin Audio
- Flipdown Monitor
- Bluetooth Integration
- Rear Entertainment System
- Windows Tinting
- Steerig Wheel Upgrade
- ECU Tuning
- Car Wrapping
- Dash Upgrade
Leave A Comment